No products in the cart.
Seller Help : Managing RMA & Warranty
How To Manage Return and Warranty Request Effectively
Benefits of Return and Warranty Request Policy for Your Marketplace
Compare to physical stores, the rate of return goods is fairly high for online stores. The reasons are pretty obvious. Unlike physical stores, they are buying products from online stores only by trusting the owner’s words and reviews.
They are not eligible to test or trial the products before buying. So, after purchasing, if the products don’t meet their expectations, of course, they will think about returning or asking for a refund for the product.
Hence, a strong return and warranty policy are important, especially in the case of online marketplaces. Providing a hassle-free return policy gains the trust of your customers easily. Whereas, giving a product warranty means backing the products you are selling on your eCommerce marketplace. Both prospects look promising.
Besides, having warranties on products gives a message to your customers that your products are reliable and you yourself have confidence in your products.
Therefore, to put it in simple words, you need to have a strong return and warranty policy setup for your marketplace to win the trust of your customers.
A strong return policy-
- Helps to create repeat purchases
- Builds strong customer relationship and trust
- Saves you from incurring a loss, as the refund money has to be paid by the owner
- Minimizes return and refund requests
- Reduces cart abandonment.
Whereas warranty on products-
- Shows your dedication and care
- Boosts customer loyalty
- Engages potential customers
- Improves sales performance.
So, to ensure a good and strong return and warranty policy-
- Make sure your product information is clear
- Customers should notice the policies
- Include products reviews, so customers can make data-driven decisions
- Add labels for shipping.
Setting Global RMA : You can also set the Global RMA policy which shall be applicable for all of your products from vendor dashboard. SETTINGS>RMA
This global policy will be visible to the buyers for all the products unless overridden by that specific product.
Label: This is the part where the vendor adds a label to the RMA facility for the customers for his all products. In this case, it is labeled as ‘Warranty’. The vendors can add any label of their choice.
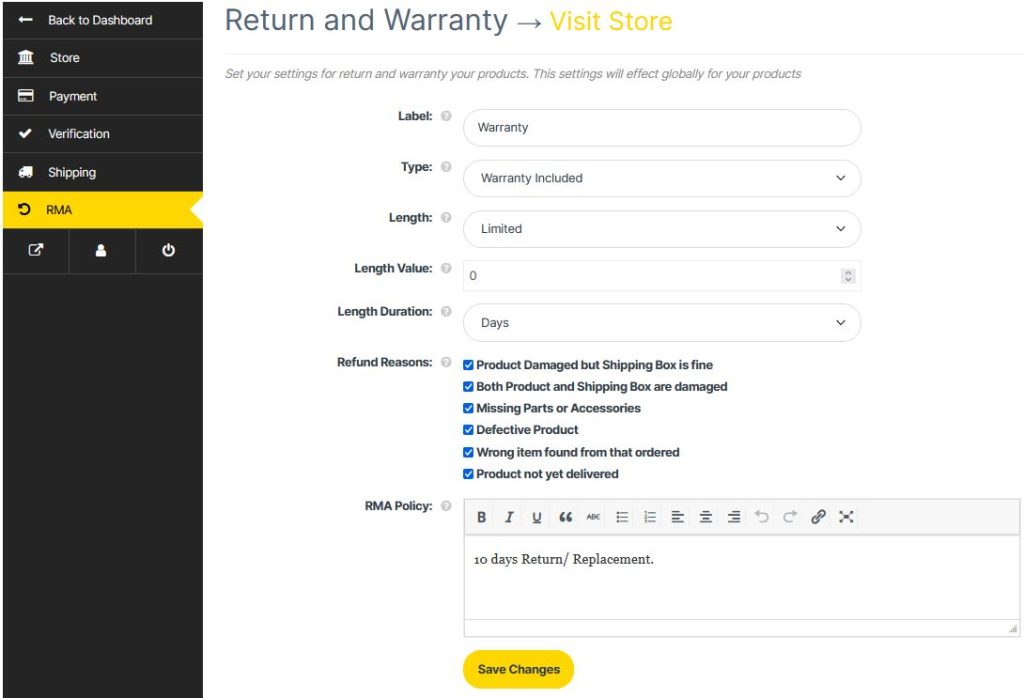
No Warranty, Warranty Included & Warranty as Add-On: The vendor can choose the type of warranty for the customers from here. Basically, there are three types of warranty to offer for the vendors to their customers. No Warranty, Warranty included, and Warranty as Add-On.
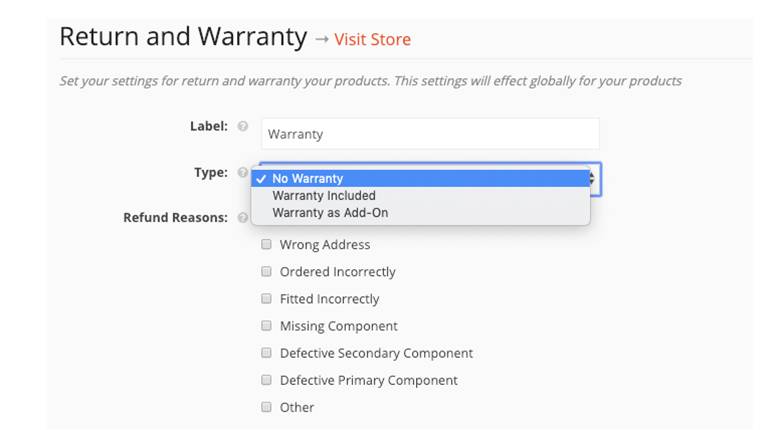
The type ‘No Warranty‘ will reveal no new option but selecting ‘Warranty Included’ will add three more options, Length, Length Value and Length Duration as seen below.
Length option is if you are looking to offer the warranty for a Limited time or lifetime. There, Length Value is the value to be added for the warranty offered for any product. Length Duration is the term of the warranty in the form of Month or Year.

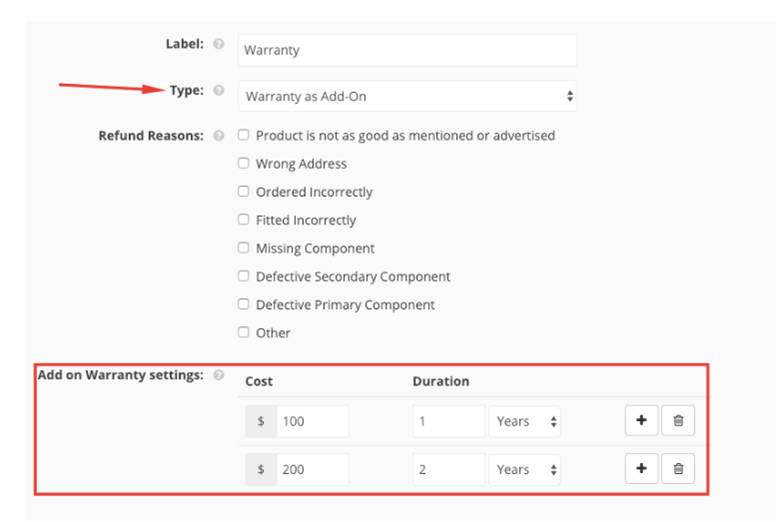
Warranty as Add-On: When the vendor chooses this option of warranty type. The vendor can allow the customers to choose an additional warranty period for an added cost. The vendor can set that cost and duration from the Add-On warranty setting option as shown below.
Refund Reasons: Here the vendor will find the refund reasons set by the admin. Now, as we have said earlier, the vendor has the power to set their own refund reasons for their individual store.
RMA Policy: This is the return and warranty request policy set by the admin. The vendors can set the policy of their own for the customers based on their store, products, and services.
However, these settings are global. That means these settings are applicable to all of the products. But, the vendors can set individual settings for a product.
Return and Warranty Request for Individual Product
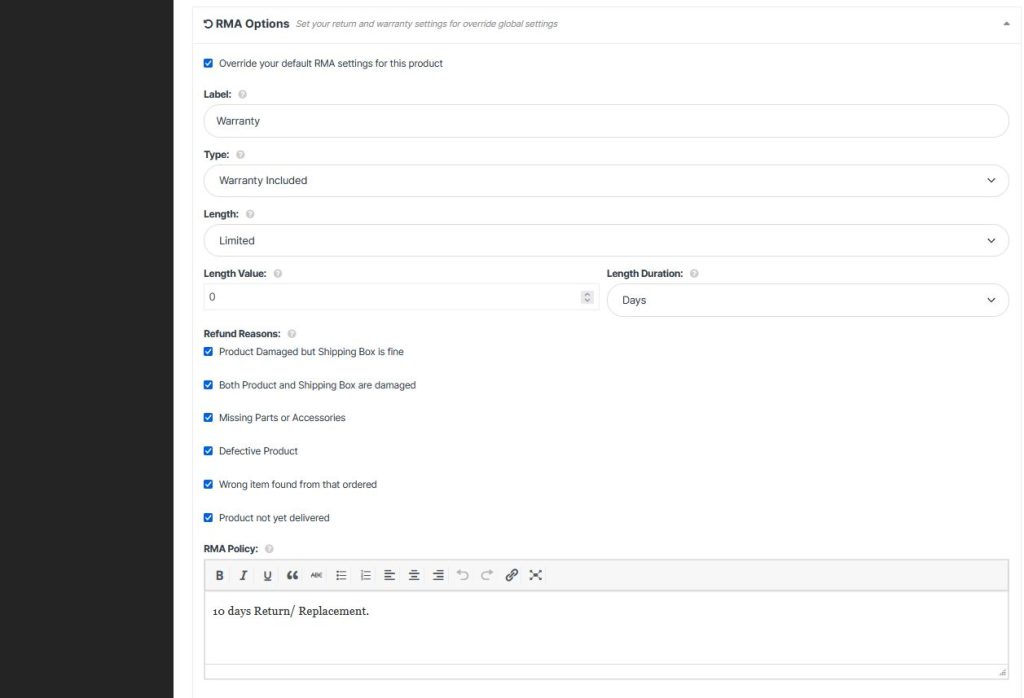
Setting Product wise RMA : You can override the default global RMA policy for the product while adding or editing as required by clicking the check box in the RMA option.

Once you check the box following screen is visible. Now you set the RMA policy specific for that product.
How to Handle Refund & Warranty Requests
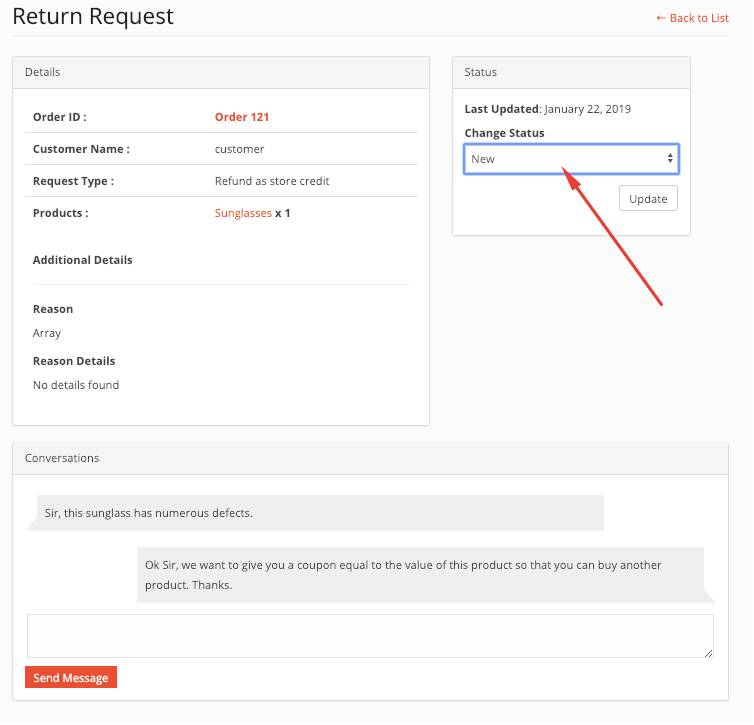
To manage customers’ RMA requests, the vendor has to go to his/her Vendor Dashboard > Return Request > Select the ‘Manage’ or Click on the view icon.
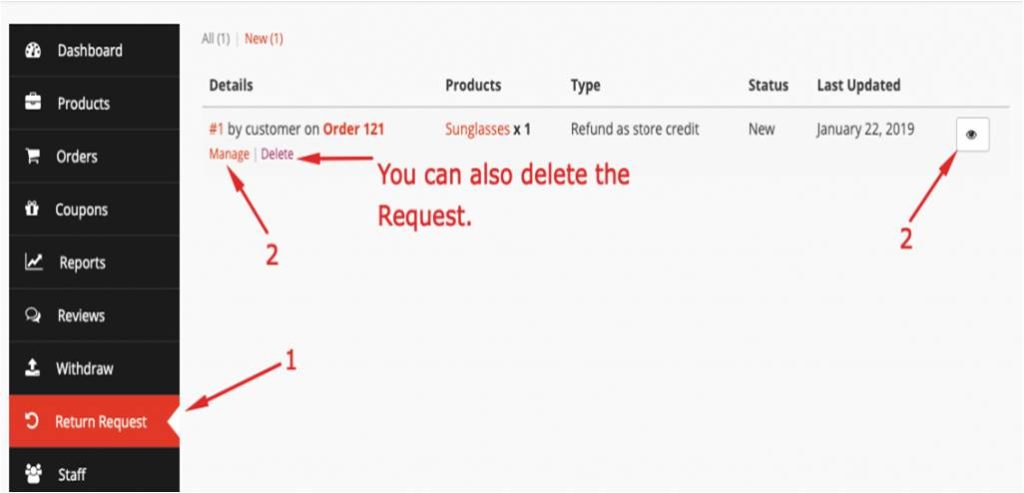
Next, vendor will get options to chat with the customer and to meet up the return request. Moreover, the vendor can change the status of the RMA request if he/she want to.
For Customers
Based on the facilities provided the admins and vendors, the customers will enjoy the RMA facility while buying products.
If the warranty type is “Warranty Included” then the warranty period is fixed.
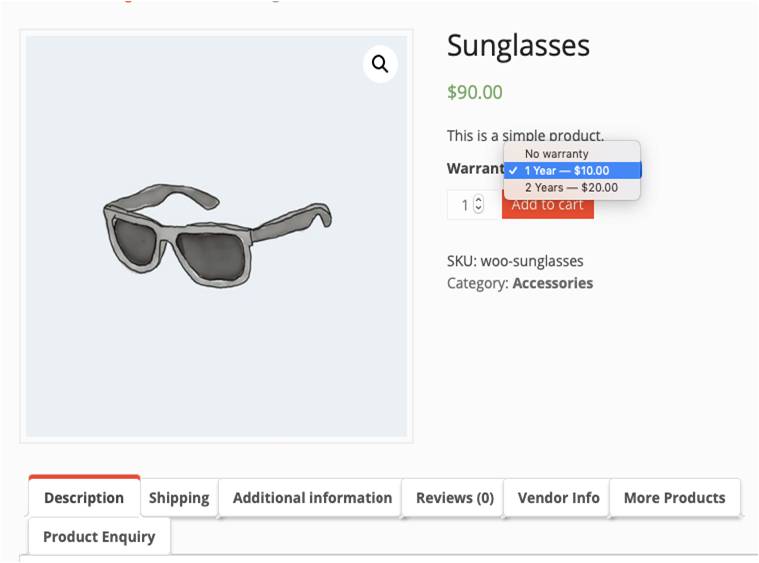
Whereas, for the ‘Warranty as Add-on‘ warranty type, the customer gets to choose the warranty duration provided by the vendors. However, they need to pay extra money for that.
Requesting For A Refund
Once the product is bought by a customer, based on the RMA setting adjusted by the admin and vendor, the customer can request for the replacement of the bought product, full or partial refund or request for Refund as store credit.