No products in the cart.
Seller Help : Listing Products
You can list your product with following details:-
- Product Images & Gallery
- Product Pricing for retail and business customers
- Product Bulk Discount
- Product Classification & Payment Offers
- Product Type, Categories & Attributes
- Product Bargaining Price
- Product SEO Keywords
- Product Shipping Details
- Product Return and Warranty Policy
- Product Visibility Status
Adding New Product
Log in to vendor seller dashboard
Click on the Products menu
Click on ‘Add New Product’ A blank page opens up to add new product
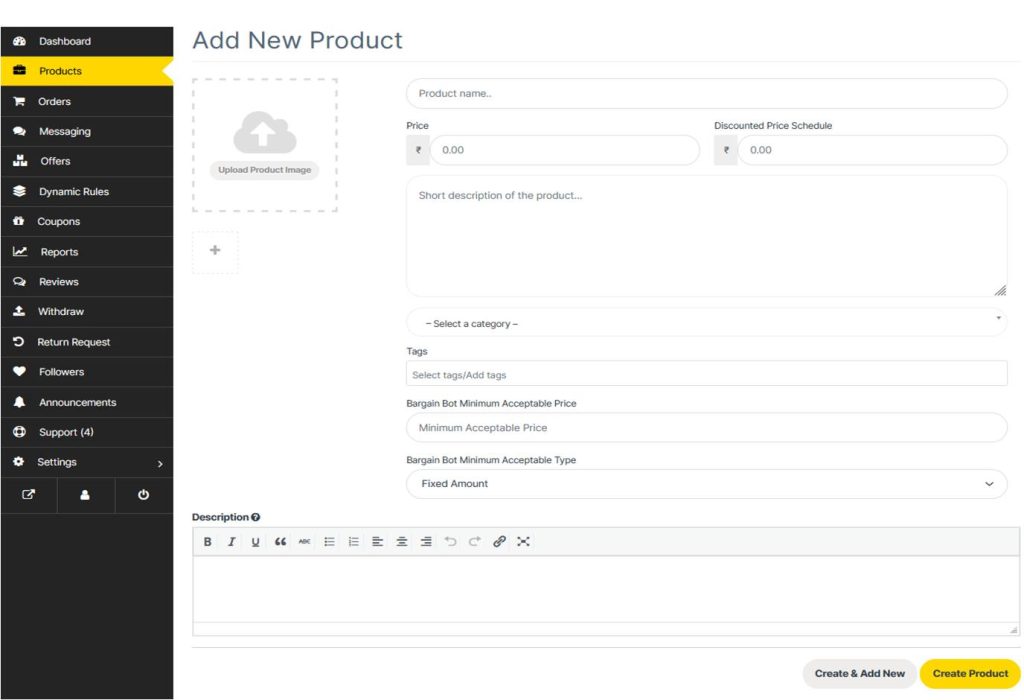
Add the details as indicated.
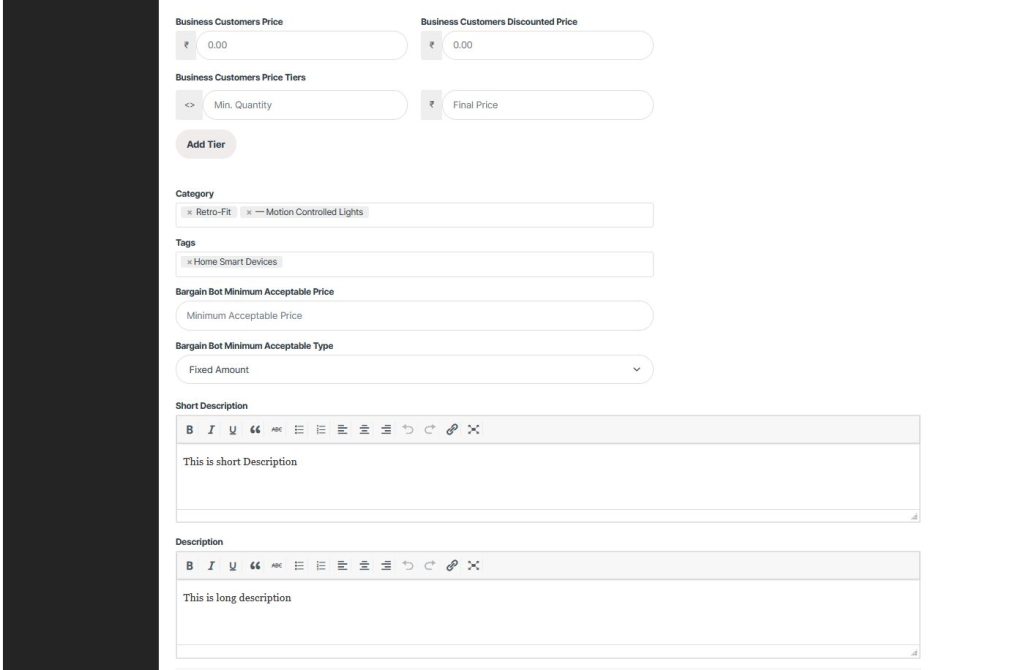
Bargain Feature: In case you want to allow bargaining for your product then you should fill in the ‘Minimum Acceptable Price’. If you fill up this filed then a buyer will be able to bargain the price of this product. Our automated system will sell the product above or at the ‘Minimum Acceptable Price’. Leave it blank if you do not want to offer the bargaining on this product.

Once done click on the Create Product.
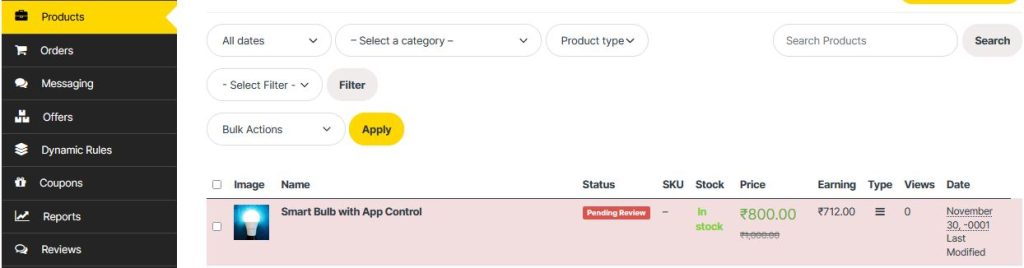
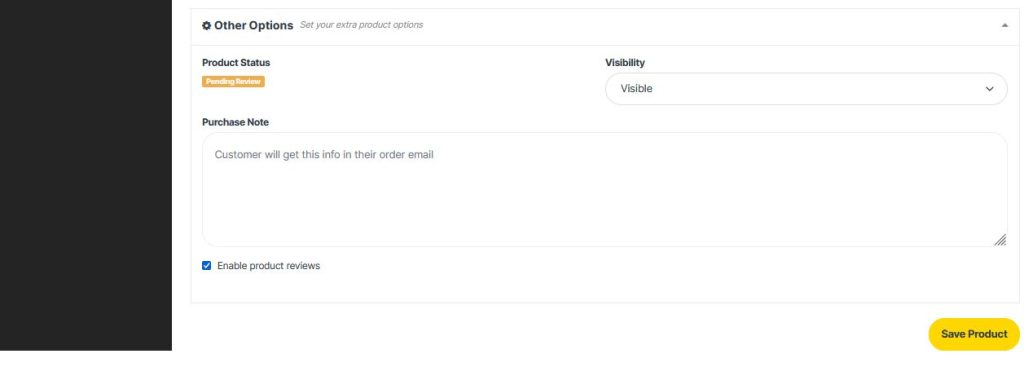
Once you create a new product it goes into ‘Pending Review’ status. Till such time it will not be visible in the front shop. Once it is approved for quality it will be published automatically. Editing of any information also places the product under review. Irrespective of the status you can keep on editing to add rest of the product information.
Edit Product : A new page of edit product will open up to fill in more details. You can edit the product anytime from the product list on your dashboard.
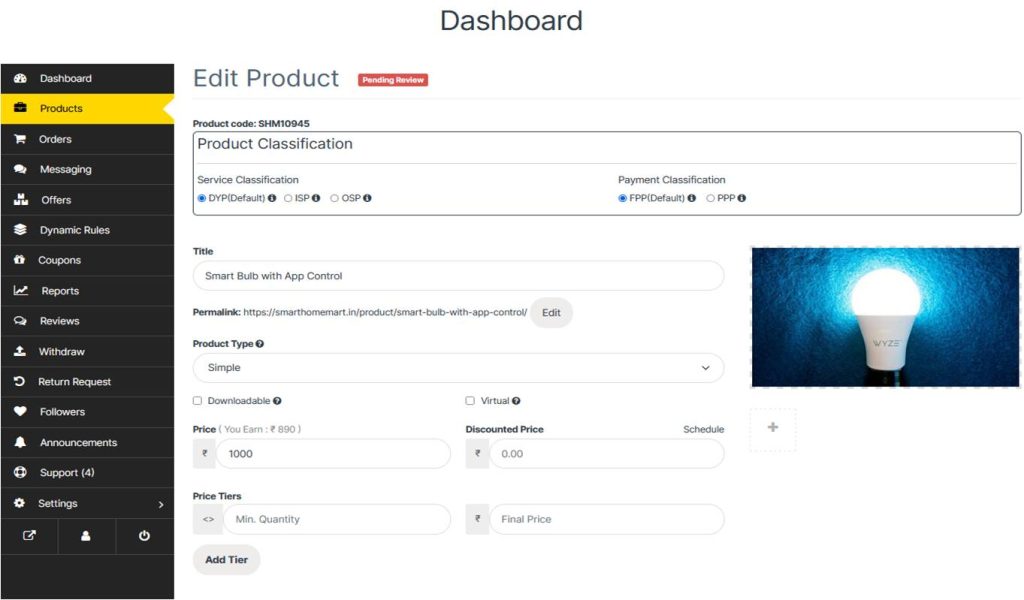
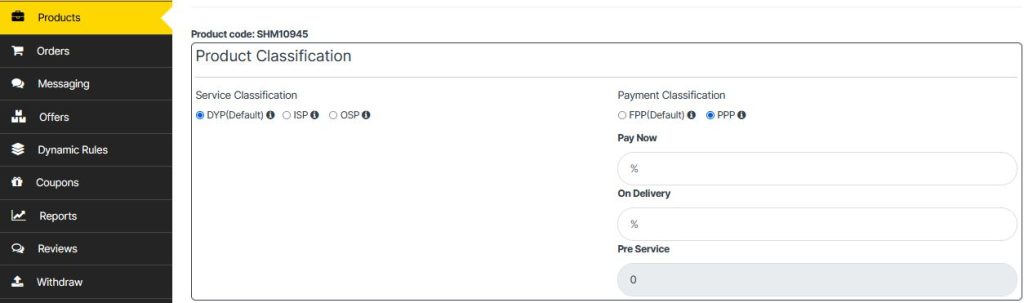
Product Classification
Service Classification : Any product can be classified for services in three ways:
- DYP : Do Your Self Product: Normal product/kit/bundle/package with no services offered. This is the default
- ISP : Included Service Product. This is a product/kit/bundle/package, cost of which includes the cost of installation services as well. The seller is required to install the product post delivery. Once a product is classified as ISP, the product is only visible to buyers local to the seller as per the service range of the seller. The range of services is required to be filled up in the ‘Service Range’ in SETTINGS>STORE. Default is 50Km. For Terms of Installation Services Click Here..
- OSP: Optional Service Product. This is a product/kit/bundle/package, cost of which does not include the cost of installation service. You are required to mention the service cost separately in case of OSP. Buyer will have an option to ask for service. In that case the service cost will also be added to the final product cost. If a buyer opts for the service then only the local sellers will be visible to him as per the ‘Service Range’ set by the seller.
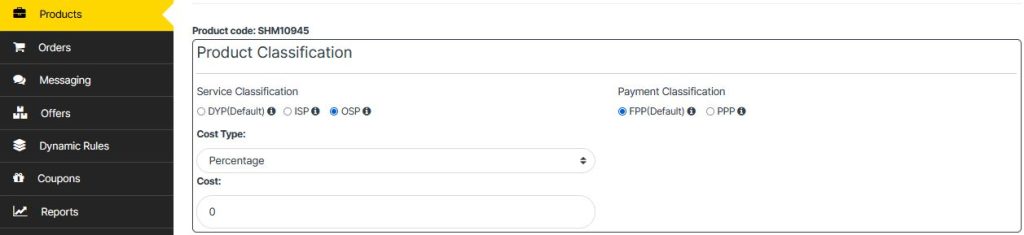
Payment Classification : Seller has an option to either ask for full payment upfront or progressive payment can be offered to attract the customer.
- FPP : Full Payment Plan. Buyer pays in full while placing order.
- PPP : Part Payment Plan. The seller can ask for the payment in max three installments. Pay on Order, Pay on Material Delivery and Pay before Installation. In case of ISP all three fields are enabled. However in case of DYP/OSP only first two fields are enabled. In case of OSP the Pre-Service charges are picked up from the OSP charges fields.
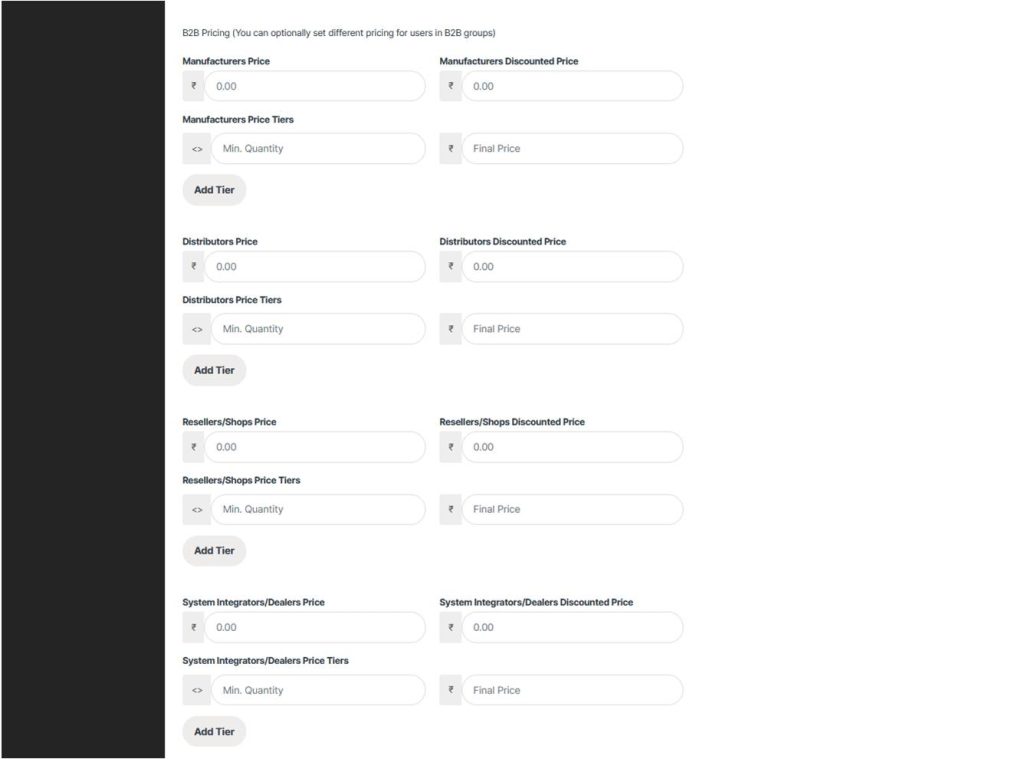
B2B Pricing : Following screen shows the B2B pricing that can be set in case you wish to offer different pricing to the different segment of the business customers.
Inventory Management : Here you can set your inventory accounting units

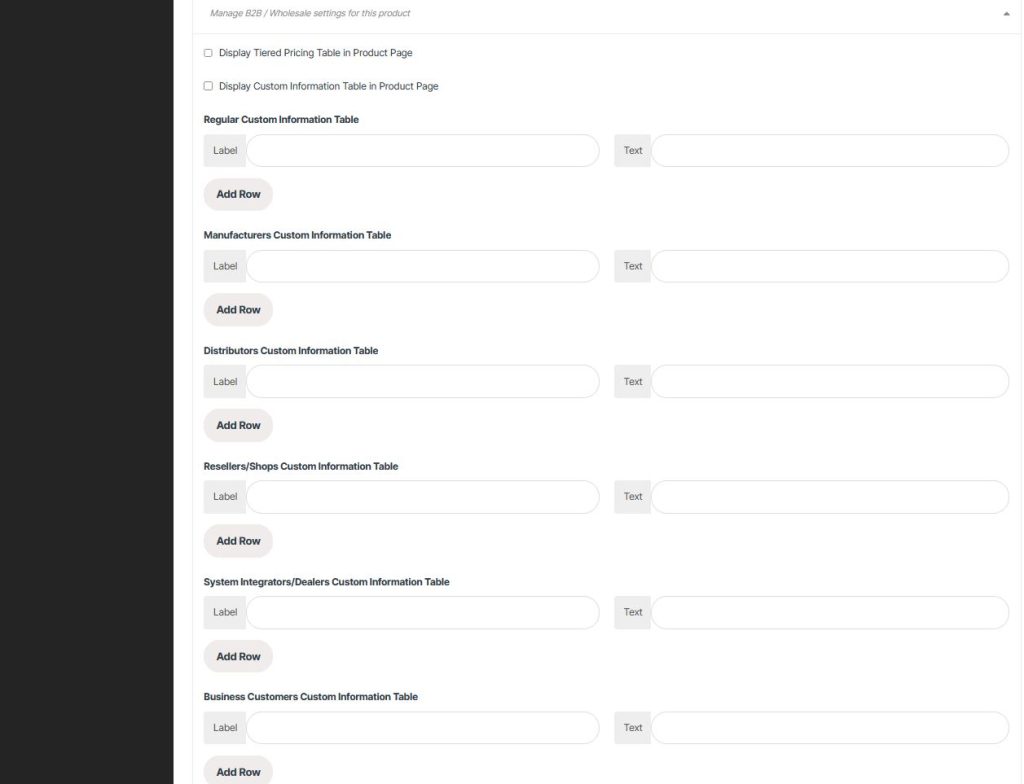
B2B Settings : Here you can manage the settings of your B2B listing. Enable the tiered pricing and add custom information for various groups.
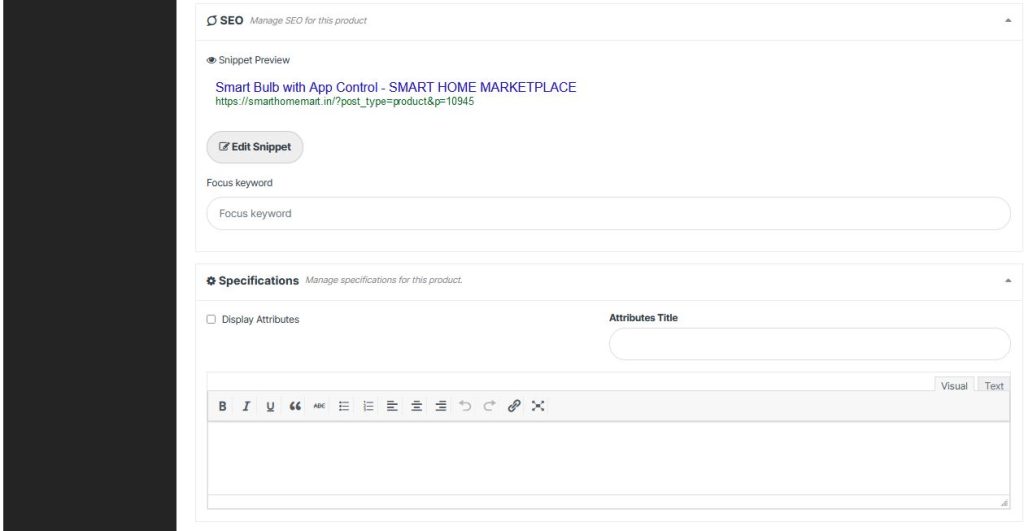
SEO & Specifications : Here you can manage the Search Engine Optimization with focus keywords and specifications of your product
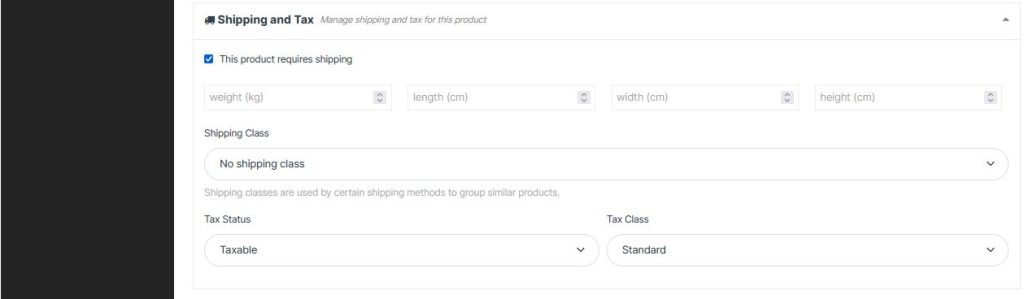
Shipping : Here you can set the shipping details for this product. For setting of shipping charges please visit page Setting Shipping Methods & Charges
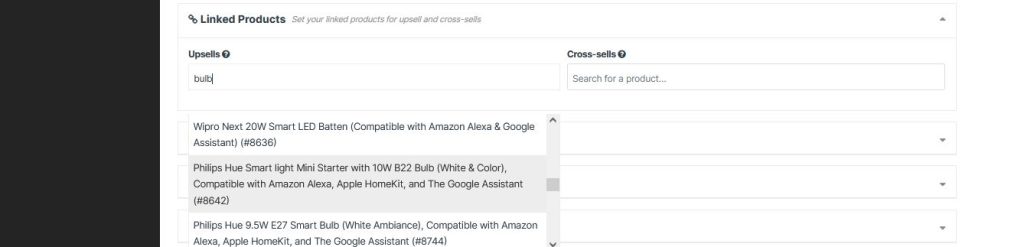
Linked Products: Here you can set the linked and cross selling products from the drop down list of your existing products
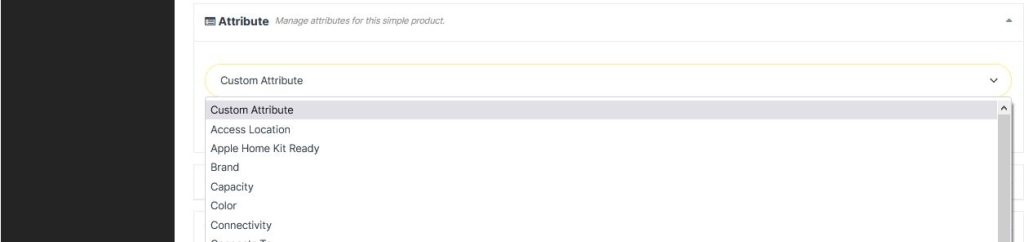
Attributes : Here you can set the attributes of your products. You can chose from the pre-existing list of attributes or type your own
Discount Options: Here you can set the bulk discounts for the customers.

RMA: Return and Warranty Settings. Here you can set the RMA policy for this product.

Setting Global RMA : You can also set the Global RMA policy which shall be applicable for all of your products. SETTINGS>RMA
This global policy will be visible to the buyers for all the products unless overridden by that specific product.
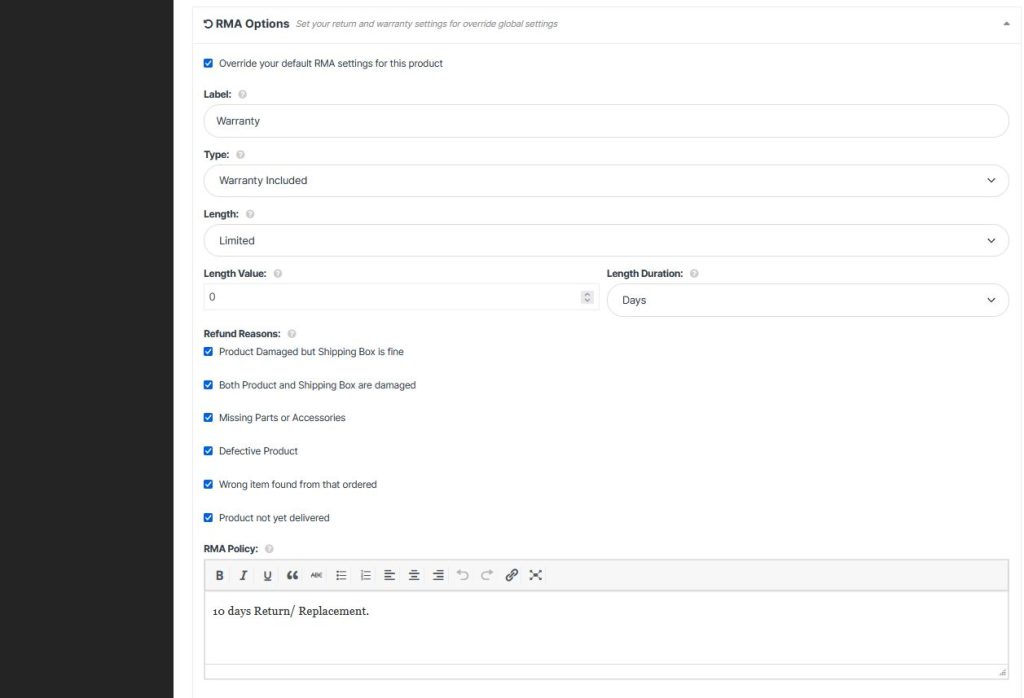
Label: This is the part where the vendor adds a label to the RMA facility for the customers for his all products. In this case, it is labeled as ‘Warranty’. The vendors can add any label of their choice.
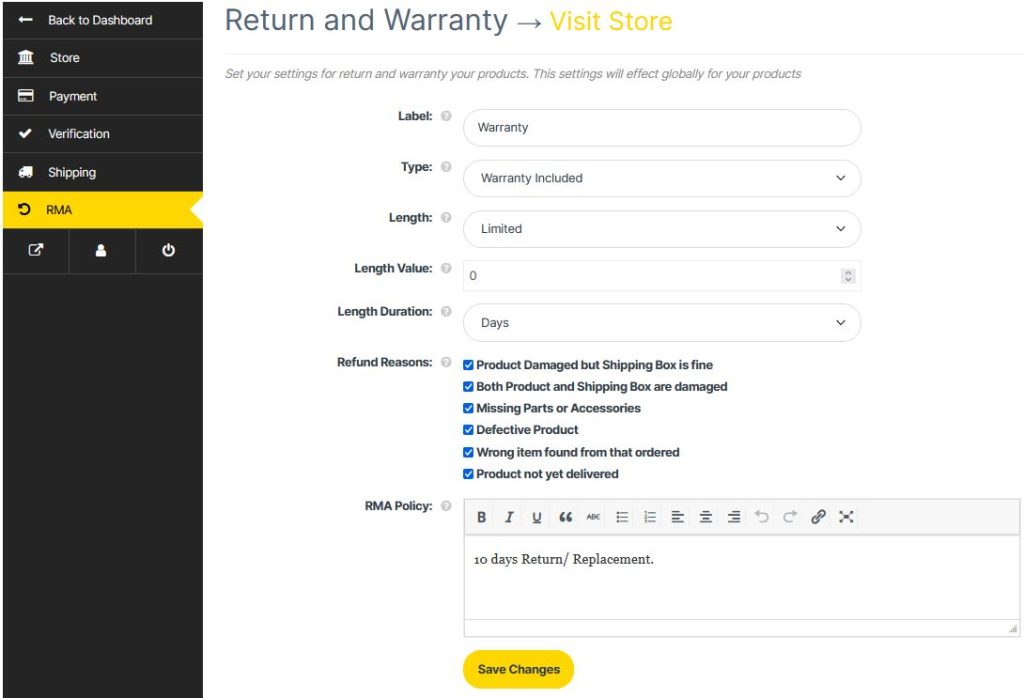
No Warranty, Warranty Included & Warranty as Add-On: The vendor can choose the type of warranty for the customers from here. Basically, there are three types of warranty to offer for the vendors to their customers. No Warranty, Warranty included, and Warranty as Add-On.
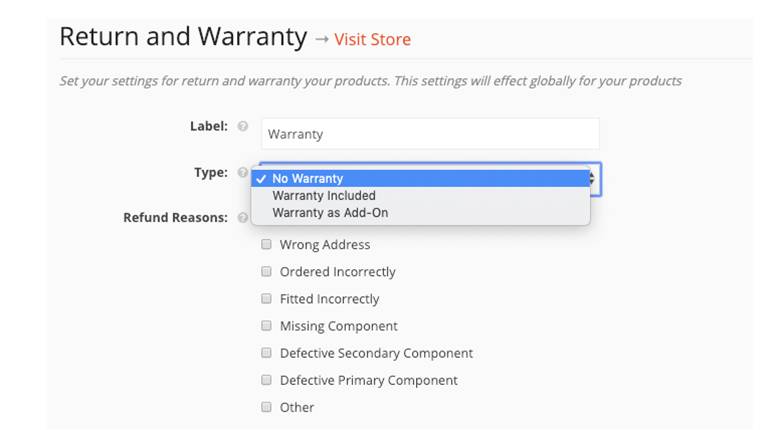
The type ‘No Warranty‘ will reveal no new option but selecting ‘Warranty Included’ will add three more options, Length, Length Value and Length Duration as seen below.
Length option is if you are looking to offer the warranty for a Limited time or lifetime. There, Length Value is the value to be added for the warranty offered for any product. Length Duration is the term of the warranty in the form of Month or Year.

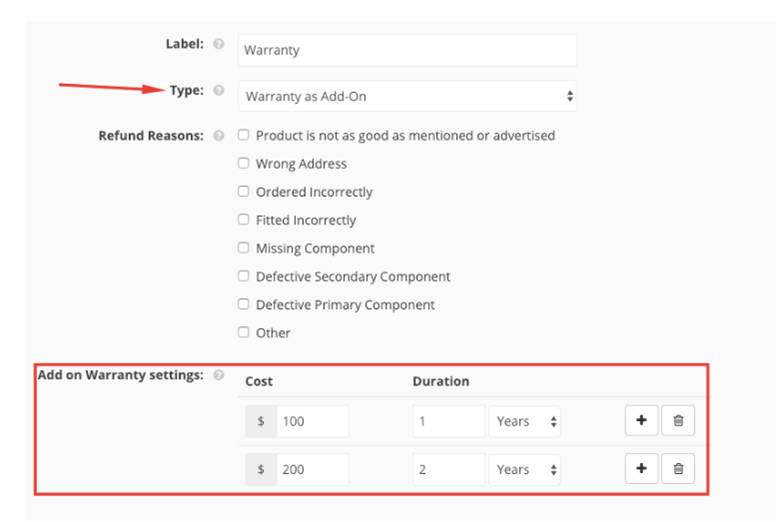
Warranty as Add-On: When the vendor chooses this option of warranty type. The vendor can allow the customers to choose an additional warranty period for an added cost. The vendor can set that cost and duration from the Add-On warranty setting option as shown below.
Refund Reasons: Here the vendor will find the refund reasons set by the admin. Now, as we have said earlier, the vendor has the power to set their own refund reasons for their individual store.
RMA Policy: This is the return and warranty request policy set by the admin. The vendors can set the policy of their own for the customers based on their store, products, and services.
However, these settings are global. That means these settings are applicable to all of the products. But, the vendors can set individual settings for a product.
Setting Product wise RMA : You can override the default global RMA policy for the product as required by clicking the check box in the RMA option. Once you check the box following screen is visible:
Now you set the RMA policy specific for that product.
How to manage RMA & Warranty? Check Here..
Miscellaneous Options : Here you can see the product published status and also hide your product from the marketplace listing. You can also set a personalized purchase note for for your buyer.
You can view your recent added product in the list of the products in the dashboard and manage them from here.